Wow. It's amazing how quickly time flies when you are super busy. One minute I'm crafting and posting and posting and crafting and then the next minute I'm so bogged down with homework, and working at B&N's, and attending classes that it's been a little under a month since my last post! So sorry! I'm guessing for the next few weeks my posts will coninue to be sparse as I finish classes and complete finals. The other thing that makes posting really, really difficult is that a majority of the items I have been crafting are christmas gifts for loved ones, so I obviously cannot post the how-to's until all the gifts have been recieved. Expect a load of posts after the holidays!
I did want to take a moment to share some how-to's for costumes that I have created over the last few weeks. This includes my halloween costume (Lady Gaga "Born This Way" Skeleton) and a costume for an 80's party (Rainbow Brite). Below you can check out the directions on how to create these costumes for yourself.
I did want to take a moment to share some how-to's for costumes that I have created over the last few weeks. This includes my halloween costume (Lady Gaga "Born This Way" Skeleton) and a costume for an 80's party (Rainbow Brite). Below you can check out the directions on how to create these costumes for yourself.
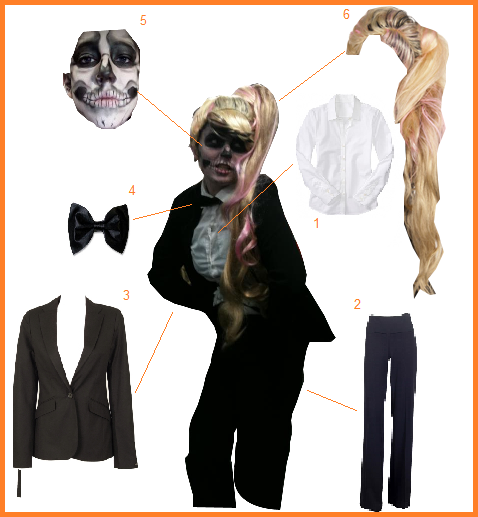
1. Grab a white button up. Make sure the buttons come all the way up on it because you will be adding a bow tie.
2. Black Dress Pants
3. Black Blazer. If you have the time (which unfortunately I didn't) you can add padding in the shoulders to make them more Gaga.
4. A black bow tie. I actually made mine out of black fabric, but you can get a bow tie pretty much anywhere
5. Grab some white grease paint and some black eyeliner and make your face into a skeleton. I used Lizzeh's tutorial on Cut Out + Keep as a guide.
6. If you hair is really long, you can pull it into a side pony tail and spray it pink. I, myself, have short hair, but I found a great alternative! There is an official Lady Gaga Side Pony Tail wig available on the web. I purchased mine on Amazon. It was really nice quality and well worth the money.
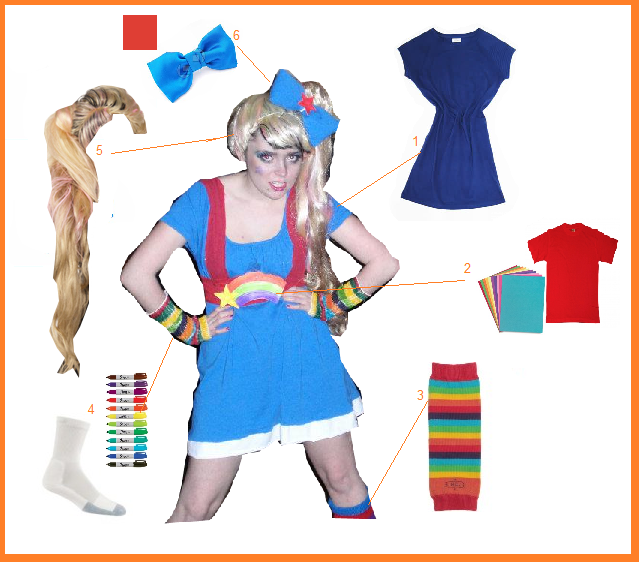
1. Grab a blue dress and white to the bottom. I purhased my dress at Salvation Army and used the hem on a white t-shirt to trim it.
2. Take a red shirt and make a belt with suspenders. Take some construcion paper and markers and make a rainbow. Super glue the rainbow onto the belt.
3. For the leg warmers you can also use rainbow tube sox, or follow the same directions I will outline in the next step. Spencer's sells the rainbow leg warmers for $10.
4. For my arm bands I took a pair of white tube socks and used colored sharpies to color in rainbow stripes. You can use this same technique in place of the leg warmers, or you could purchase a second pair for your arms. Another alternative is to get rainbow tube socks and cut the bottoms off.
5. Lady Gaga wig strikes again. You could get any blonde wig with a side pony tail, or pull your hair up!
6. Grab a blue bow and some red construction paper. Cut out a star and super glue it to the bow. Tie the bow around your pony tail!
* don't forget to add a purple star to your cheek! *
 RSS Feed